Translate

Wednesday, July 28, 2021

Trash Talk - The Garbage System

 Let's start with the most frequently asked question.  "Why is the garbage system always down?" The short answer to that question is: it is not.  We work tirelessly to try and keep the garbage system maintained and operational.  However, I can see why it may seem that way.  It does go down and it goes down far too often.   

Now let's look at how our garbage system works.  The garbage system is made up of three main parts.  

  1. The Garbage Chute.   This Chute goes from the 60th floor to Basement level 1.  That is a very long shaft and a great distance for garbage, recycling, and organics to travel. Depending on the weight of the item(s), you may press the appropriate button inside the refuse room, but by the time those lighter items reach the bottom, the divider is no longer in the position that you selected.  This is an important fact that we will come back to.

  2. The Tri-sorter.  This is the dividing "blade" that moves into position based on what button you press in the refuse room on your floor.  The three choices/positions are a) Garbage, b) Recycling, and c) Organics.  In the garbage room on B1, there is a bin for each of those choices, placed beneath the appropriate openings.
      
  3. The Compactor.  This is a motorized press of sorts.  Its job is to compact refuse inside the attached garbage bin in order to take up less space and minimize the number of pick-ups we need as a Condominium Corporation.
We produce a lot of waste. We are nearly 700 units.  Because of this, we have scheduled waste removal twice per week.  Every Monday and Thursday.  Each pick-up includes Garbage, recycling, and organics.  During these days we run the wash-down system which runs a cleaning solution and water from the 61st floor and exits the garbage chute at the bottom in B1. We also clean and sanitize the entire garbage system, bins, and the Garbage/Compactor room.    

We perform chute maintenance as well.  Oiling hinges of the chute doors in the refuse rooms and making minor repairs if required.  I am telling you all of this, for all of you to better understand the effort that goes into our waste removal.  

So what is the problem?  The vast majority of the time, the problem with the garbage system is what goes down the chute.  There seems to be a misunderstanding or thought process, that as long as the item(s) is made to fit past the refuse room door and into the chute, the item(s) will make it to the bottom in the exact shape that left the hand that pushed it in.  This of course is not the case.  All of those big boxes that may have been folded over and over and placed down the chute, open up like an Accordion.  Remember when I said that we would come back to number one?  Bigger/inappropriate items create shelves that falling garbage rests on.  Gravity and weight do aid the descent of the items but sometimes they don't make it down in time before the dividing blade tries to move into a different position.  Those items now end up in between the blades, jamming the system and it responds by going into service mode.  

What can you do to help?  There are a few things that you can do to help us out.  

  1. Communicate.  There isn't a flashing light or indicator that informs building staff when the garbage system is off-line.  We do check and check often, but outside of those times and especially after hours, We need people to let us know that the garbage system is not working.  Please contact security when you discover that the garbage system is not operating properly.

  2. If the garbage system is not working, please do not place waste items in the refuse rooms.  I know it isn't pleasant to hang on to items inside your unit, but leaving waste in the refuse room can cause other issues.  If you absolutely must dispose of your waste immediately, please take it down to B1.

  3. Please follow the rules.  I can almost feel the eye rolls on this one but the rules for garbage disposal are in place for a very good reason.  Big items can not go down the chute.  Inappropriate items can not go down the chute.
Here is a short list of items that need to be brought down and absolutely not put down the chute:

  • Large cardboard.  Ikea, Mattress boxes, television boxes, food delivery subscription boxes, diaper boxes. 

    Note: loading up a box with other items and then placing it down the chute, reinforces the box and makes it heavier.  It is better to bag the items, place them in the chute and break the box down and place it inside the recycling room on B1.

  • Clothing, Bedding, and Linens. These items get stuck in the dividing blade very often.  Please just bag and bring these items down to B1.

  • Appliances of any size.  Anything with a power cord in general.  Power cords are the garbage systems' nemesis.
     
  • Furniture of any size.

  • Clothing hangers, storage boxes, and diaper pails (usually full of dirty diapers)  should not go into the chute.

  • Poles, broom handles, shower curtains, waste bins, rugs, and shelving units of any size.

  • Metal, wood, paint cans, construction waste, or supplies.  Flooring, tiling, drywall, and spray cans.

  • Finally, but important because it happens on a daily basis.  Sharps.  please do not dispose of medical waste down the garbage chute.  It is not likely to cause a garbage jam or cause the garbage system to go offline but it does create a hazard.

Following this will ultimately help keep the garbage system up and running and minimize the amount of time that the system is offline.  We appreciate all of the help that we can get and thank you in advance!


Monday, July 12, 2021

What is it? Where is it? And what does it do?

Moving into a Condo can be equally exciting and daunting at the same time.  You have packed, you have booked the elevators and checked off the other 50 things on your to-do list and now it is move-in day!  You have arrived, loaded the elevators, and managed to get your belongings into your new home.  You start the tedious task of unpacking when you discover a panel door on your wall and think, wait. What does that do?  If you stop what you are doing right now (granted that you are inside your unit) and take a good look around, you are going to see a few access panels inside your closets or on the ceiling and, even on the wall.  The locations will vary depending on the layout of the Condo that you are living in, but every unit is equipped with each of the following.


1.       Fan Coil Unit

It is behind the long and vented, metal panel on the wall.  Your fan coil is what supplies heat and cooling to your Condo and is controlled by the thermostat that is also located on the wall.  Again, the location of both the Fan coil unit itself as well as the thermostat depends on the layout of the Condo.  Here are a couple of quick tips when it comes to operating and maintaining your fan coil.

- Resetting the unit can be done by removing the thermostat from its housing and then putting/pushing it back in.  You will see a thumb groove at the top of the thermostat.  Gently remove the thermostat by pulling with your thumb on the groove and your index finger bracing the bottom.  Once it is out of its housing, the screen will be blank.  Do a quick check to see if there are batteries inside.  This thermostat is hard-wired and does not require batteries at all. The only thing that the batteries do is keep your schedule settings, should a power outage occur.  I usually recommend removing them.  When putting the thermostat back into the housing, make sure that your line up the pins and gently push it back into the cradle.  The screen should restore, and you can once again, set and control your fan coil unit.

  • Something as simple as a dirty filter (located beneath the long, vented metal panel cover) can stop your heat or cooling from working properly.  Air must be able to pass through the filter, so if the filter is caked with dust, pet hair, or dirt of any kind, it may be time to replace it.  Replacements can be purchased from the building.  If you wish to extend the life of your filter, it is possible to vacuum them at least twice before needing to replace them.  You will need a vacuum cleaner with a decent brush attachment to accomplish this task.

  • If you need to shut off the fan coil for any reason, this can be done by switching off breaker #10 inside the breaker box.  See below for the details on the Breaker Panel.


2.       Breaker box panel

It is a medium-small, square metal panel located on a wall inside the unit.  Inside are the electrical breakers to the lighting, appliances, and mechanical equipment located throughout the Condo.  If a device overloads, it will trip the breaker as a safety feature to prevent electrical fires or further issues. 

  • A tripped breaker will appear to be set in the middle of the on and off sides of the box.  To reset a tripped breaker, push the switch from the middle position to all the way off until it clicks and then move it, all the way on until it clicks.  If everything is okay electrically, the breaker will reset and electricity to that area will be restored.  If the breaker immediately trips again, either the device associated with the breaker is damaged and needs to be repaired or replaced, or the there is an electrical problem that requires a licensed electrician to investigate and repair.


3.       E.R.V (Energy Recovery Ventilator)

The E.R.V unit can be found behind a large metal ceiling hatch panel.  This in most cases is in a washroom but some layouts do differ.   What does it do?  E.R.V’s draw clean, fresh air into a home, through the vents and HVAC system and removes stale air from your Condo.

  • It is important to note, that the E.R.V vents at the top (inside, behind the cover) of your fan coil unit.  Sometimes people have mistaken the sound of the fan and air coming through as the fan coil continuously running.  This is how the HVAC is set up inside the building to make sure that airflow is constant inside your Condo.

  • You can also use the E.R.V to ventilate washrooms.  Inside your washroom(s), you will see a timer on the wall.  It has settings of 20 minutes, 40 minutes, and 60 minutes. 


4.       Communications Panel

This is where your internet/network provider will hook up their equipment.  The communications panel is in a closet, behind a plastic, vented panel cover that is latched and on hinges.  It is vented so that the equipment inside gets air and does not overheat.

  • It is a good idea not to cover or block the vent slits on the panel door.

  • It is also a good idea not to store anything, but the communication equipment provided inside the panel.

 
5.       Supplemental Lint Trap and Dryer Exhaust Panels

There is a small panel above your dryer that accesses the supplemental lint trap that captures excess lint going out of the duct.  There is also an access ceiling panel, usually close by the washer/dryer unit or in an adjacent closet, that provides access to the Dryer exhaust fan.

  • You can access the supplemental lint trap and use a vacuum cleaner (wand extension) to clean out the trapped lint.  Please be careful when you perform this task.  The access is up high and in a slightly awkward position.  You will need a decent ladder and a vacuum that can reach.


6.       In-Suite Water Shut-Off Panel

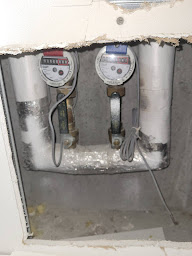
Finally and perhaps the most important is the in-suite water shut-off location.  Under the vanity in the washroom or in some cases, under the kitchen sink, is an easily removed access panel.  Behind it are the water shut-off valves for the domestic cold and hot water to the entire Condo.

  • In the event of a water emergency, shutting off these valves will stop domestic hot and cold water at the manifold.  That means that the bathroom sink, toilet (once you flush), and shower will not get water.  The kitchen sink, dishwasher, and washer will not get water.
     
  • One suggestion I have is for residents to get some kind of container/organizer that can easily be taken out from under the bathroom vanity or kitchen sink, so that if there is an emergency and the water valves need to be shut-off, there is not anything blocking/preventing the opening of the access panel.


It is a good idea to search and find everything mentioned above.  Do not be afraid to open the panels and take a peek to discover what’s inside.  The more familiar that you are with the equipment inside your Condo, the easier it will be to maintain and to respond appropriately should an emergency or unusual situation occur!